How to make motion graphics: a simple first project
Pick one short message, sketch how it should move, then animate only what helps someone read it. Start with a simple title rather than a full animated scene. For a first title, start in CapCut or Canva. Move to DaVinci Resolve Fusion or After Effects when you need control of each keyframe, and to Blender only for 3D.

Imagine a small gift shop needs an opening card that says “Fresh gift ideas.” The owner does not need a spinning logo, a moving background and flying letters at once. Our first project below brings in one title, holds it still, then fades it out. The timing and design are our proposed example.
Adobe describes animated titles and graphics as moving text or images over video. For a first project, keep the meaning clear before adding movement. A viewer should be able to read the title without having to chase it around the screen.
Before you start
Write the exact title and keep any brand colors or artwork nearby. Decide where the finished graphic will be used. Keep a copy of the original artwork so you can change the wording later. The project is finished when the exported file shows the intended message clearly, not when every effect has been tried.
Sketch a start, a movement, a pause and an ending on paper. You do not need to draw well: a box for the title and an arrow for its path are enough. If you cannot explain why a part moves, leave it still for the first version.
Step 1: pick one message and sketch the movement
Pick one message. In our gift-shop example, that is the phrase “Fresh gift ideas.” Keep an offer, a deadline or a price out of the practice card unless it is real and current. A short neutral title lets you concentrate on the motion.
Sketch the movement. Choose where the title begins and where it should stop. Then leave a reading pause before the ending. Hold it still long enough to read. Moving text continuously can make the animation harder to follow than a plain title.
Step 2: choose the simplest tool for the job
The tools below offer different ways to build the same small idea. The “choose it for” column is our recommendation. The cost column repeats what each cited page says, rather than assuming every feature or export is included in a free download.
| Tool | Documented capability | Choose it for, our advice | Free or paid as its page says | Source |
|---|---|---|---|---|
| Canva | Drag-and-drop video editor with animations and transitions | Quick video treatments before learning manual keyframes | The page advertises free video effects; paid-feature details are not stated there. | Official page |
| CapCut | Keyframes for position, scale, rotation and other properties | A simple movement with values you control | Free download advertised; check the current feature plan for your project. | Official page |
| DaVinci Resolve Fusion | Node-based motion graphics, title animation, spline and keyframe editors | Compositing graphics alongside a video edit | Free DaVinci Resolve download and a paid Studio edition are offered. | Official page |
| After Effects | Text presets, keyframes and animation of individual characters | Detailed control over a title or its letters | Price not stated on the cited text-animation help page. | Official page |
| Blender | Keyframing in a 3D creation suite | A project that actually needs 3D animation | Free and open source. | Official page |
| Remotion | Videos and motion graphics built with React | Developers who want a code-based workflow | Free license for individuals and companies of up to 3 people; other companies need a Company License. | Official page |
Sources: Canva, CapCut, Blackmagic Design, Adobe, Blender and Remotion; cost wording read 29 October 2026.
Fusion’s node-based workflow connects effects in a chain of blocks. After Effects offers text animators that can change individual characters. Those are different ways to gain control, not reasons to make the practice title complicated. Choose the one that matches the kind of work you want to learn.
Step 3: animate with keyframes
Animate it. A keyframe marks a state at a chosen moment: where something is, how large it is or how visible it is. Set the first state, move forward in time and set the next. Start by changing one property so you can see what caused the movement.
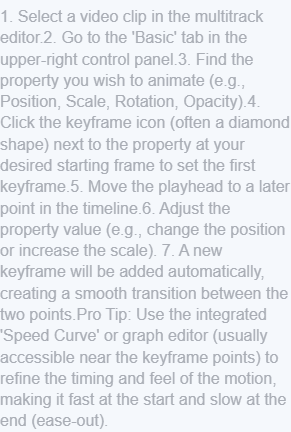
CapCut’s official walkthrough starts by selecting a video clip in the multitrack editor. Open the Basic tab, find the property to animate and use its keyframe icon at the starting frame. Move the playhead later and change the value; the page says a new keyframe is added automatically. Use its keyframe guide for the matching controls.
In the example below, the title rises a little as it becomes visible, then stops. Make the reading pause longer than the arrival. If the words are still hard to read, simplify the movement before adding another effect. The purpose is to reveal the title, not to show every control you found.
Step 4: export and check on a phone
Export and check on a phone. Review the exported file, not only the editor preview. Watch it at the size someone will actually see it. Check the beginning and the last frame, especially if the graphic will sit beside another clip.
Listen if you added sound, then watch silently to see whether the message still works. Read the title aloud during the pause. If you have to rush, give it more time or shorten the wording. Save the editable project as well as the finished video.
- Pick one message
- Sketch the movement
- Animate it
- Export and check on a phone
Example: a five-second animated title (our suggestions)
This is our original practice plan for the fictional gift shop. Use dark text on a plain light background. Put “Fresh gift ideas” on one title layer or card. Keep the background still so the title is the only moving part.
Build this practice plan using the Basic tab and keyframe controls described above. These are our suggested values, not a tested project.
- At 0.0 seconds, set the title 40 pixels below its final position and set opacity to 0%. Use the keyframe icon beside each property.
- Move the playhead to 0.6 seconds. Change position to the final location and opacity to 100%.
- Move the playhead to 4.4 seconds. Keep that position and 100% opacity, adding keyframes with the icons to mark the end of the hold.
- Move the playhead to 5.0 seconds. Change opacity to 0% and leave the position still.
Time          Title position                 Visibility      Purpose
0.0 seconds   Below its final position       0%              Start unseen
0.6 seconds   At its final position          100%            Finish arrival
4.4 seconds   Same final position            100%            Hold for reading
5.0 seconds   Same final position            0%              Fade out

Suggested movement: rise 40 pixels during the arrival.
Do not move the background.
Text: “Fresh gift ideas”
Use the same final position at 0.6 and 4.4 seconds.
The repeated position and visibility values make the hold deliberate: nothing changes during the reading pause. The last state fades the title without sliding it away again. These are proposed values for practice, not an app test or a platform’s required duration.
Make one version with that plan. If it feels rushed, shorten the wording or extend the hold. If it feels busy, remove the position change and try a fade alone. Change one thing, export again and compare the saved files.
Which tool should you learn next?
Our recommendation: finish a simple title in CapCut or Canva first. Move to Fusion or After Effects when the project needs finer control. Learn Blender for a project that needs 3D, or Remotion if you prefer building the graphic with code.
Frequently asked questions
Keep the first project small enough to finish and understand.
Do I need a 3D tool for a first title?
Start with a simple title if that is the whole job. Blender is a free, open-source 3D creation suite; choose that route when the project needs 3D.
What if I want to animate individual letters?
Adobe’s After Effects help describes text animators and selectors for properties of individual characters or a range of characters.
Can I make motion graphics with code?
Remotion uses React to create videos and motion graphics. Its page offers a free license for individuals and companies of up to three people, with a Company License for those who do not qualify.
How long should my first animation be?
Our five-second example is a practice plan. Leave enough still time to read the words, then adjust your own version after watching the exported file. Try a shorter title before making the movement faster.
Sources
Source: Canva: video effects, read 29 October 2026.
Source: CapCut: keyframe animation, read 29 October 2026.
Source: Blackmagic Design: DaVinci Resolve Fusion, read 29 October 2026.
Source: Adobe: animating text in After Effects, read 29 October 2026.
Source: Blender: animation, read 29 October 2026.
Source: Remotion: motion graphics with React, read 29 October 2026.
Published · Updated