How to Crop a Video on iPhone, Android and Windows

Short answer
iPhone Photos: open the video, tap Edit and Crop, drag the crop corners or pick a ratio, then tap Done. Done saves the crop.
Mac Photos: open the video, click Edit and Crop, then drag the selection rectangle. Changes affect the whole video; Revert to Original removes adjustments.
Windows Clipchamp: select the clip and click the crop button, drag the handles, then click done to finish the crop. Click Export at the top right, then choose a resolution to save an MP4 to your computer, usually in Downloads.
Android Google Photos: open the video, tap Crop and choose the framing options. Tap Save at the top to save a copy.
Before you start
Have the video on your device and the app for your route: Photos on iPhone or Mac, Clipchamp for personal accounts on Windows, or Google Photos on Android. For the Clipchamp route, have your personal Microsoft account ready.
You will have a cropped clip. On iPhone, Revert undoes saved edits; on Mac, Revert to Original removes adjustments. Google Photos saves a copy on Android. Cropping changes the visible frame rather than shortening the running time.
Our suggestion: decide what must stay visible before dragging corners. Play the full result to check any movement near the edges.
On iPhone: Photos
Step 1: open the video in Photos
Open Photos on your iPhone and tap the video. Tap Edit, then Crop. You are now working with the framing tools rather than the clip’s length.
For other edits alongside the crop, see editing a video on iPhone. Keep this pass focused on the area you want viewers to see.
Step 2: choose the area or a ratio
Drag the rectangle corners around the area you want to keep. You can also pinch open or closed. When you drag a corner, the crop tool keeps the original aspect ratio. Tap the lock at the top-right to unlock it when changing that ratio.
For a standard preset, Apple’s instruction is: “Tap [icon], then choose an option such as Square, Wallpaper, 9:16, or 5:7.” Our suggestion: try the intended shape before making small framing changes. Check that the important action still fits.
If the picture needs turning, use Rotate to turn it 90 degrees. The Flip control flips it horizontally. Review the subject’s position after either change.
Step 3: save the crop
Tap Done to save your edits. If you dislike the changes before saving, tap Cancel, then Discard Changes. With iCloud Photos, edits are saved across your devices.
Play the clip after saving. Look at the start and end as well as the middle. Check any movement near the edge of the new frame before sharing it.
Step 4: undo a saved crop if needed
Open the video again, tap Edit, then Revert to undo saved edits. Revert is the route after saving; Cancel and Discard Changes are the choices while abandoning the current edit.
If the framing feels too tight, return to the original and try a wider crop. Keep the subject in view throughout the movement rather than choosing the closest possible frame.
- Open the video in Photos
- tap Edit and Crop
- drag the crop corners or pick a ratio
- tap Done
On a Mac: Photos
Open Photos and double-click the video, then click Edit in the toolbar. Click Crop and drag the selection rectangle around the area to keep. You can also use the tilt wheel to adjust the angle, or Auto to straighten it.
Click Reset to cancel the crop. Revert to Original removes all adjustments made to the video. Mac Photos changes affect the entire video, rather than a chosen part.
On Windows: Clipchamp
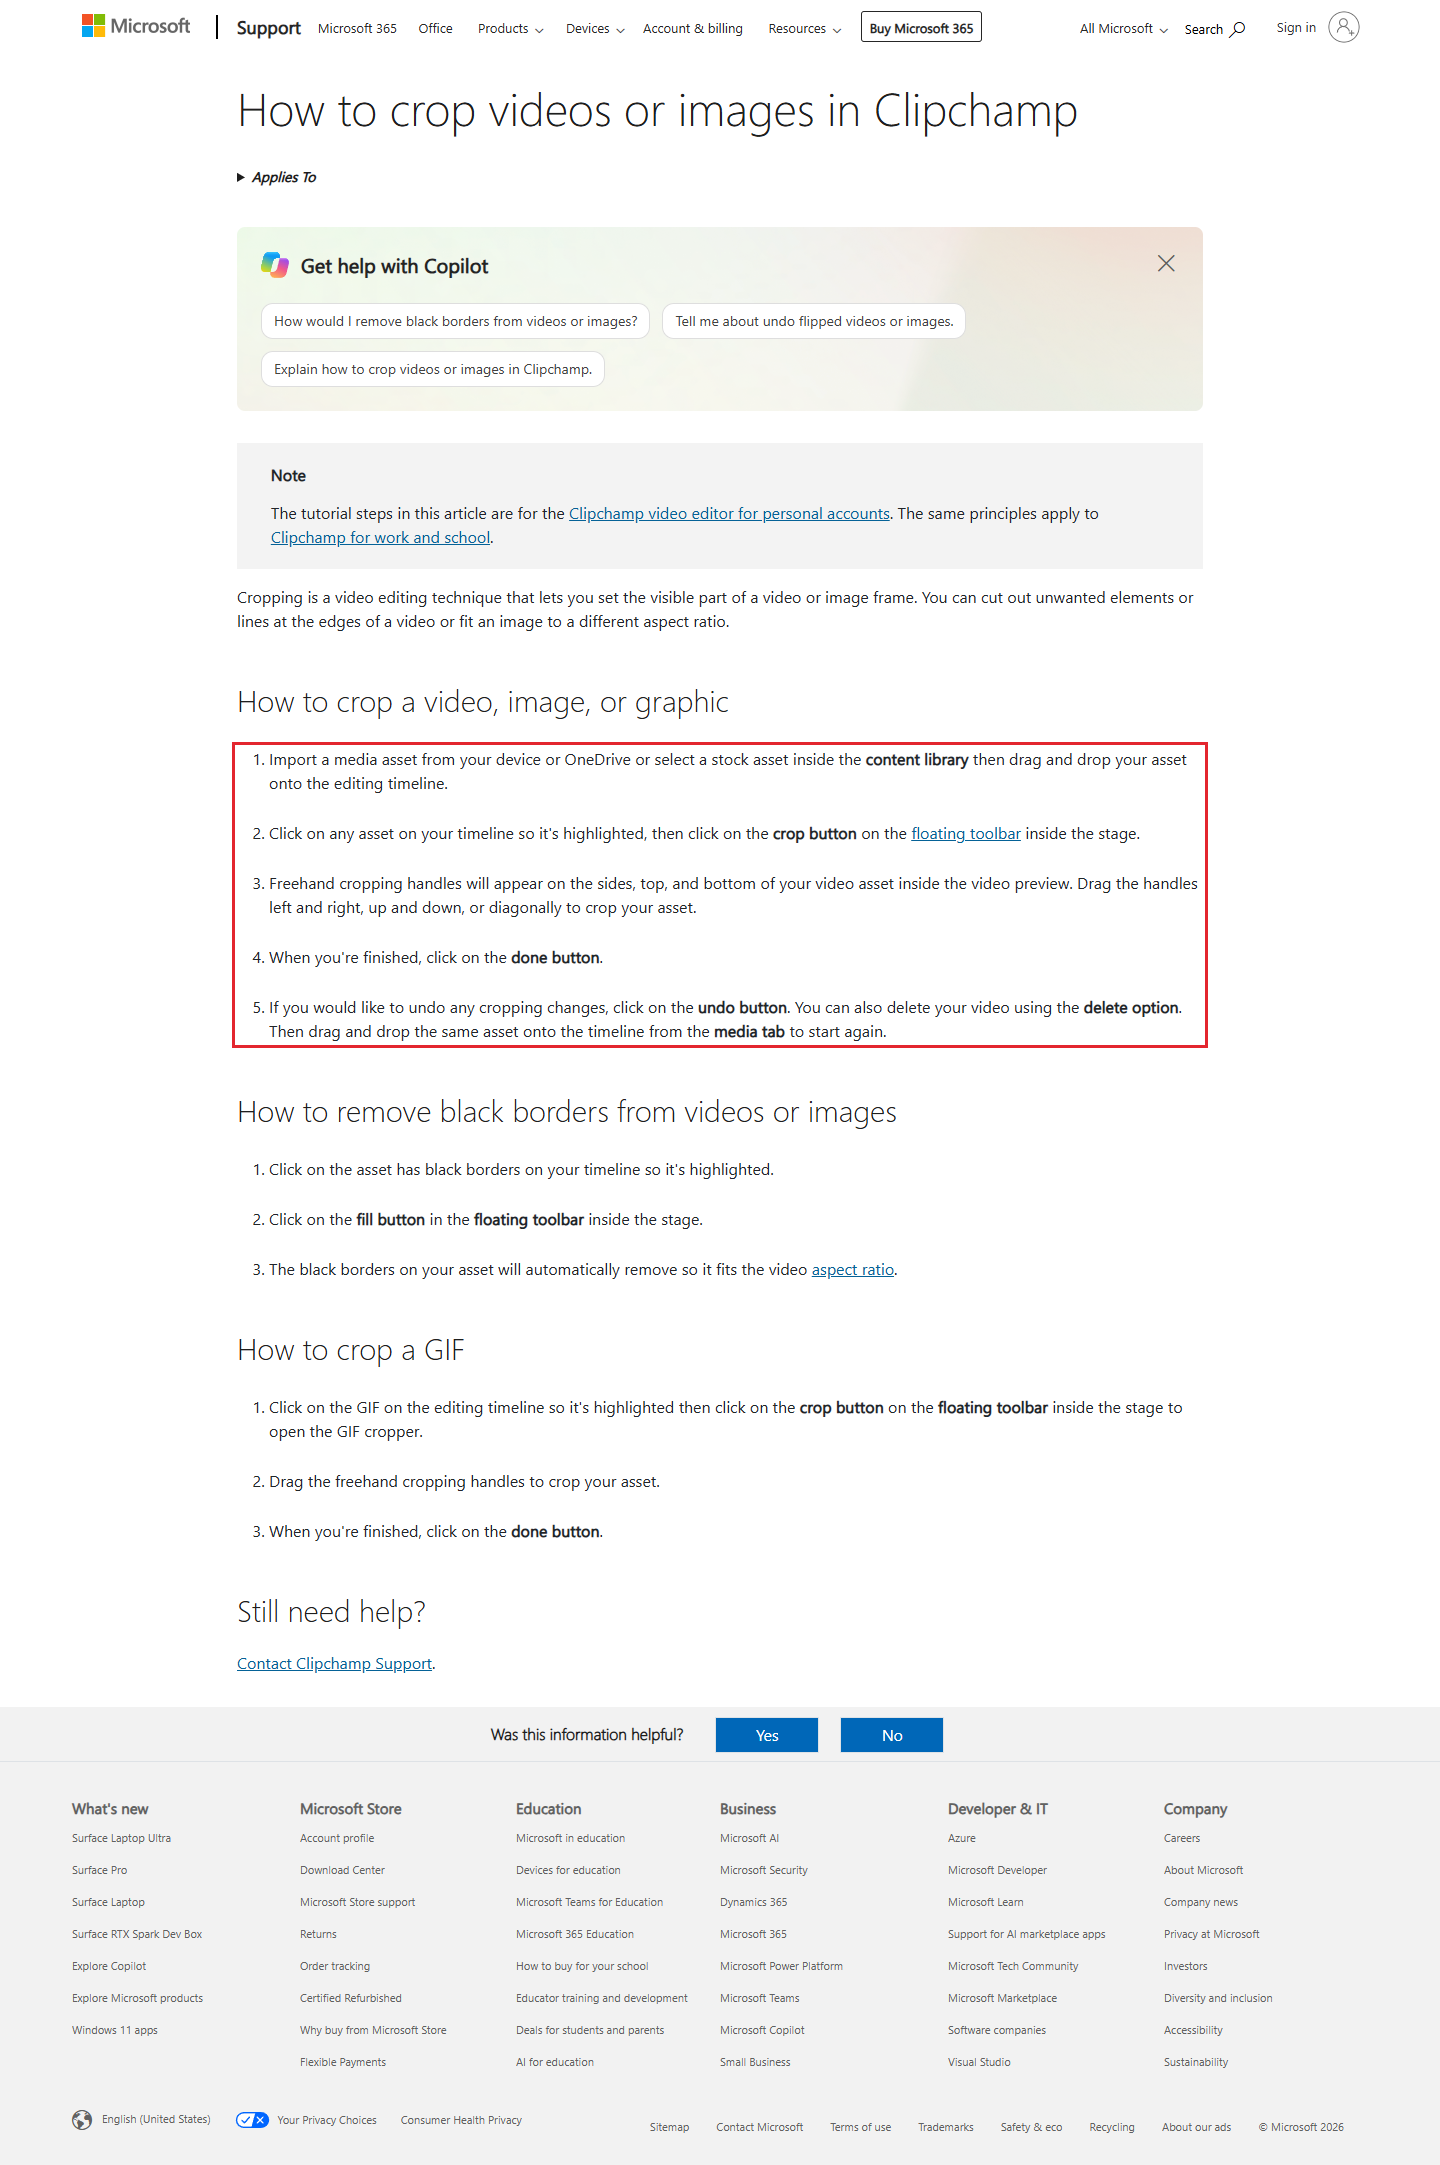
Microsoft’s crop instructions are written for the personal-account editor. Import the video and drag it onto the editing timeline. Select the clip, then click the crop button on the floating toolbar inside the stage.
Freehand handles appear around the video in the preview. Drag them left, right, up, down or diagonally to choose the area. Click done when finished. Use undo if you want to reverse the crop.
In Clipchamp for personal accounts, editing progress saves automatically. To save the finished video, click Export at the top right corner of the editor. Choose a resolution; the video exports as an MP4. Microsoft describes 720p as suitable for social media videos.
After you choose the resolution, exporting starts with a progress bar. When finished, the video saves to your computer, usually in the Downloads folder.
For black borders, select the clip and click fill on the floating toolbar. That removes the borders so the asset fits the video aspect ratio. Review the result before deciding that the new framing works.
| Device | App | Where to start | Maker’s note |
|---|---|---|---|
| iPhone | Photos | Edit, Crop | Done saves; Edit, Revert undoes saved edits |
| Mac | Photos | Edit, Crop | Whole video changes; Reset cancels crop |
| Windows | Clipchamp | Select clip, crop button | Personal-account instructions; fill removes black borders |
| Android | Google Photos | Open video, Crop | Save creates a copy; at least 1 GB RAM and Android 6.0 or later; non-Pixel Android 9 devices have no video editing |
Source: Apple iPhone Photos, Apple Mac Photos, Microsoft Clipchamp and Google Photos, read 5 November 2026.
Android phones
Google says crop, straighten and filters need an Android device with at least 1 GB of RAM and Android 6.0 or later. Its help page also says non-Pixel Android devices running Android 9 do not support video editing.
If you do not see Crop
For Google Photos on Android, check that the device has at least 1 GB of RAM and Android 6.0 or later. Non-Pixel phones on Android 9 do not support video editing. For Windows, the Clipchamp steps here are written for personal accounts.
Our example: a bakery counter video plan
Our example (illustrative, not a real client).
Golden Crust Bakery has a 30-second cake-counter video with distractions at the edge. Our proposed crop keeps attention on the cake and the hand placing its decoration.
- Clip: the cake counter before the shop opens.
- Destination: a vertical social video.
- Shape: our suggestion is to try 9:16 for a vertical post.
- Keep visible: the whole cake and the moving hand.
- Save: tap Done, then play the full clip.
- If too tight: use Revert and try a wider framing before sharing.
Cropping changes the framing. To change the pace as well, see speeding up a video.
Frequently asked questions
How do I make a square or vertical crop?
Choose a preset ratio in iPhone Photos. Apple lists Square, Wallpaper, 9:16 and 5:7. Review the framing before tapping Done.
Why does the crop keep the same shape?
The crop tool keeps the original aspect ratio when you drag a corner. Tap the lock at the top-right to unlock the ratio.
Can I undo the crop after saving?
Yes. Open the iPhone video, tap Edit, then Revert. On Mac, Revert to Original removes all adjustments.
Sources
Maker instructions read 5 November 2026.
Published · Updated